or Complex dinners
This article volume and in direct (it is a lot of images) and figurative sense (all stages of processing in a complex).Questions of converting RAW of a file (that, what for and when to change), and additional converting RAW for the decision of different problems (use of smart objects, creation of a mask from RAW), receptions of increase of contrast by curves in a Luminosity mode (will mention a question of use of the new tool which has appeared in dialogue of curves), improvement of "problem" areas - patches of light, increase of a saturation the channel by a mixer and a color separation one image on two profiles with different generation of a Black.
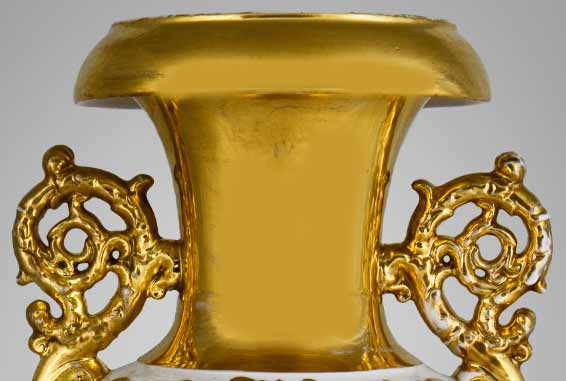
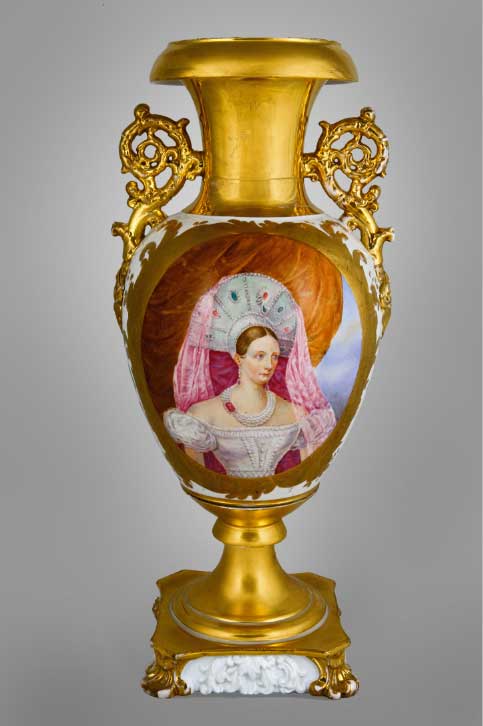
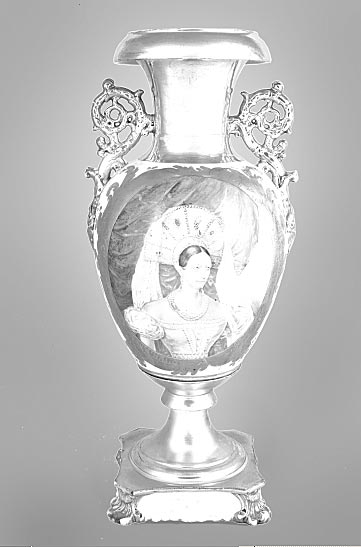
With the permission of the author what to write this article, in the course of preparation of an illustration of an antiquarian vase for printing, I have made screen pictures almost all steps which were necessary in the given job. A source code two - a picture with a scale and without. It is necessary to notice what to photograph "gold" very much and very much it is not simple, in this case it is photographed well..
Well we will begin...
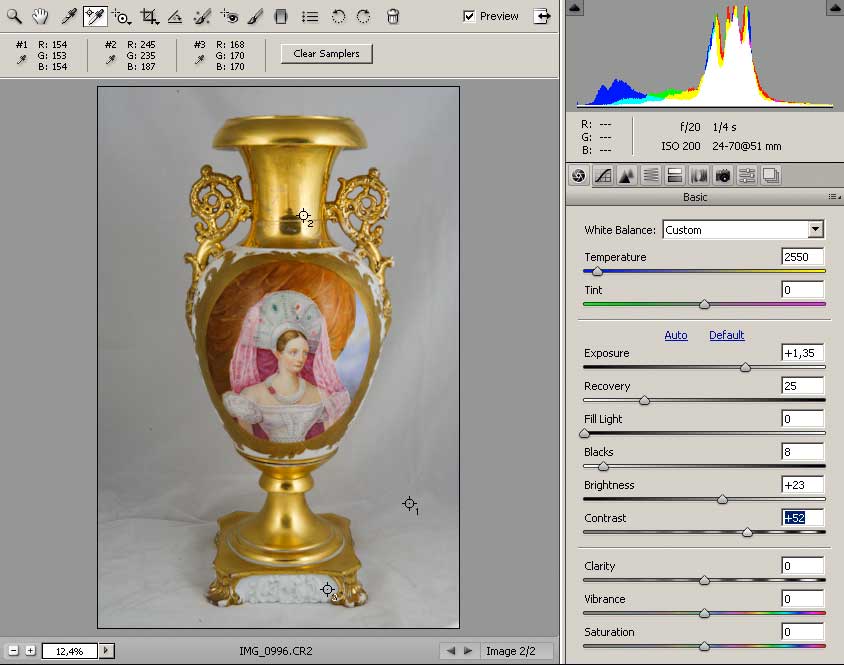
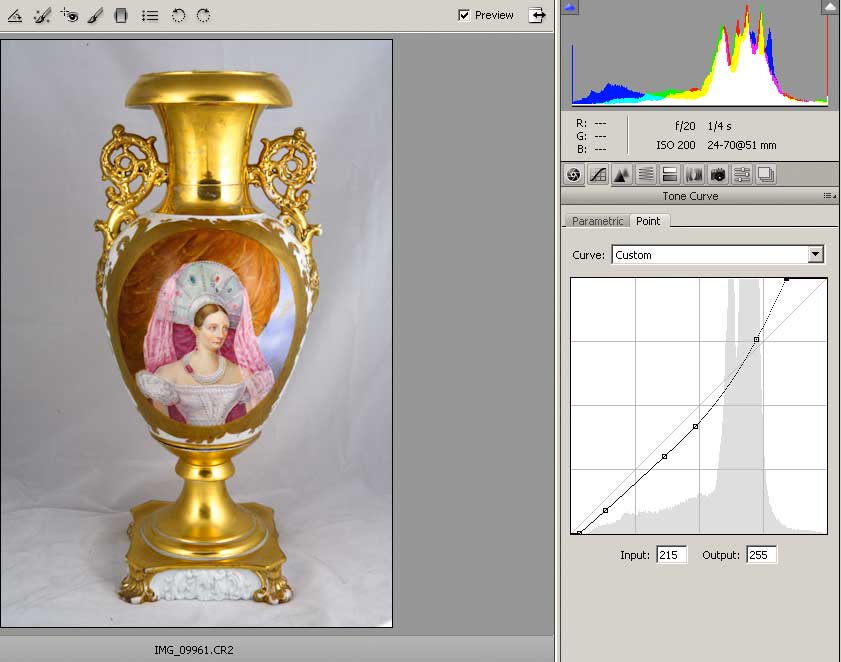
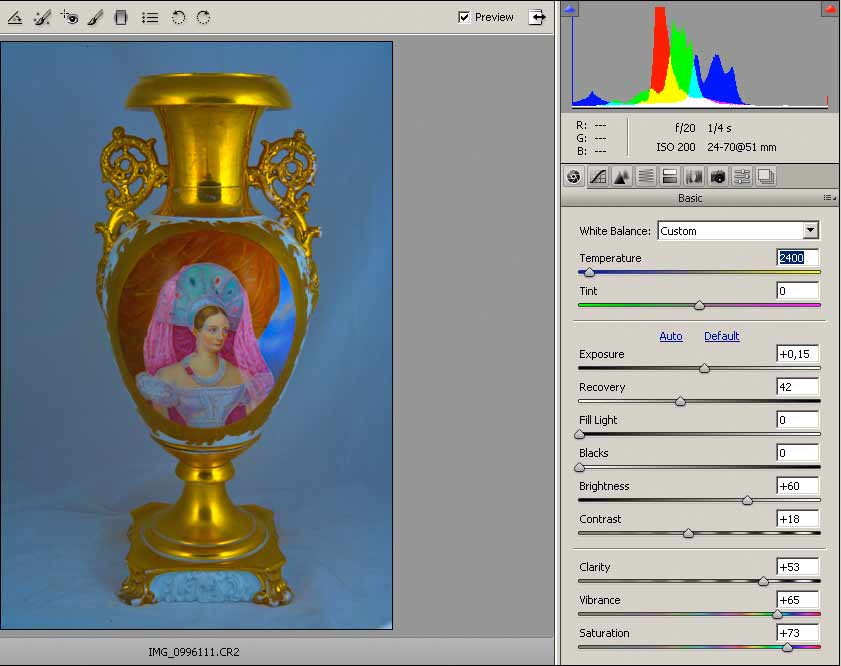
Open the converter RAW, both the frame, we select them, staying in the picture with the scale. Set the options to save the file:
We put a converter all (absolutely all) the parameters in the "zero":
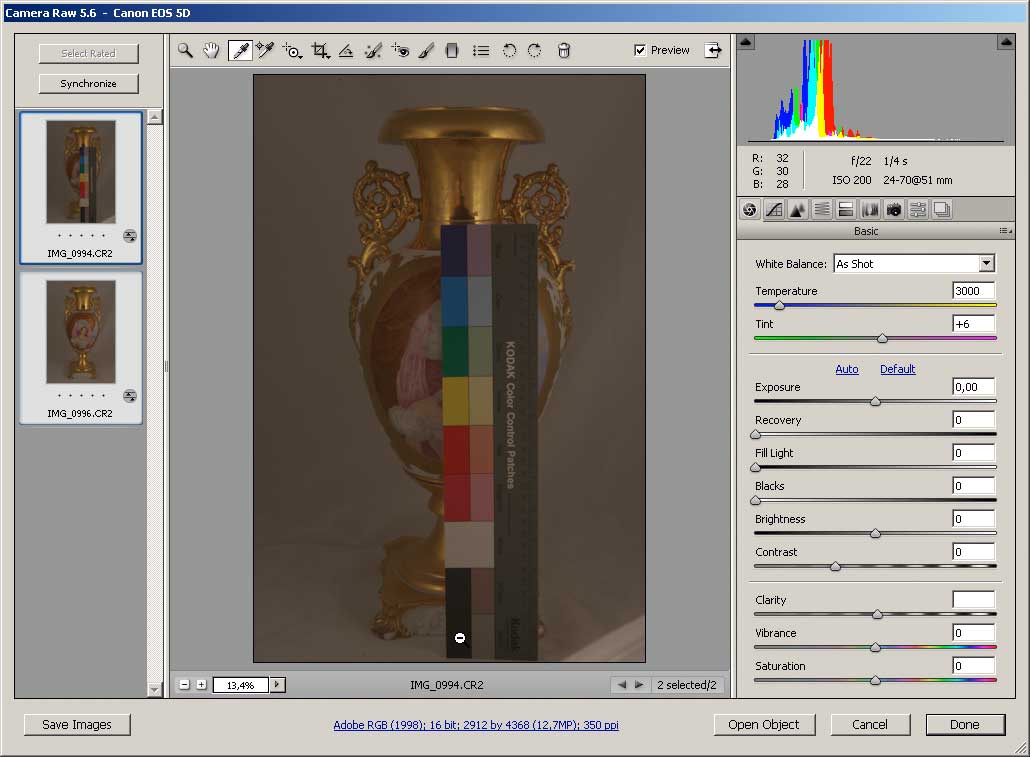
Set the camera profile - Standart:
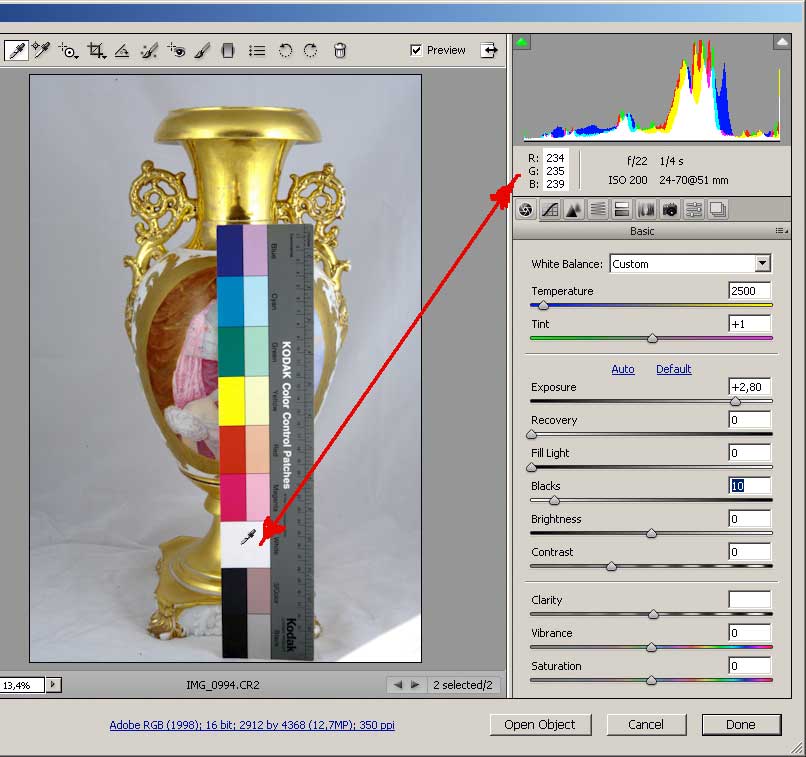
To start the white balance set on a black field scale:
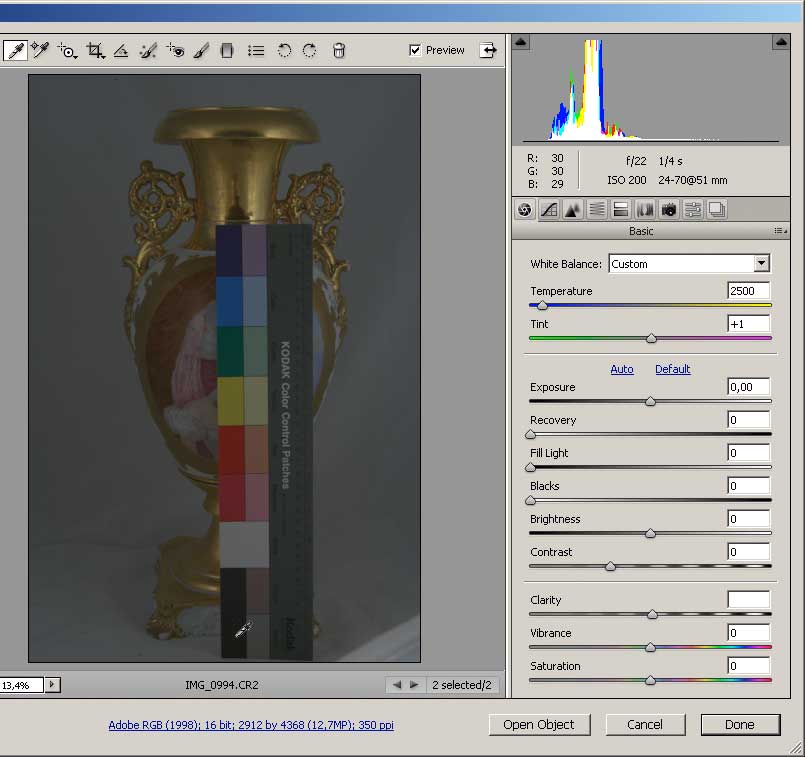
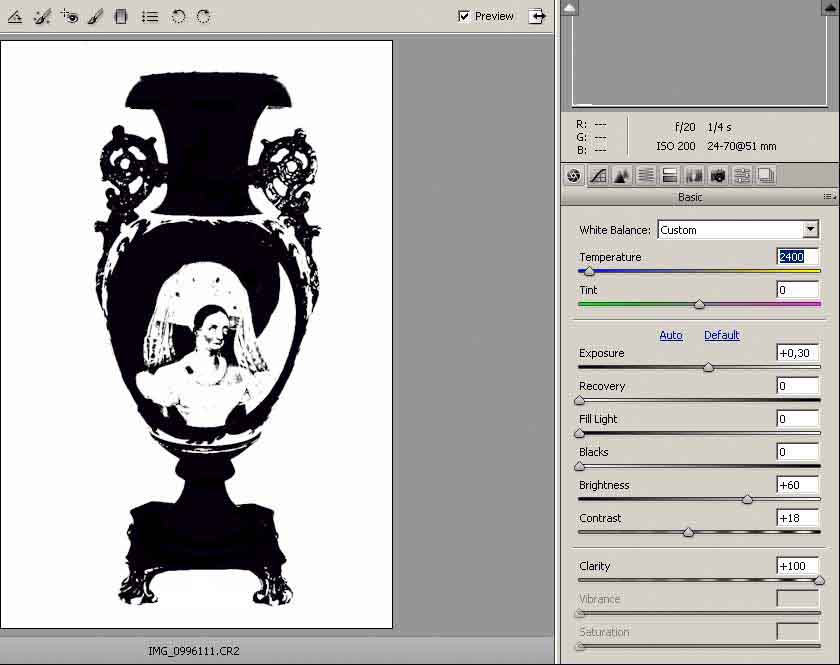
If you set the beginning of tonal range of the white field - will come out all the "charm" of gold - it becomes overexposed even when these values:
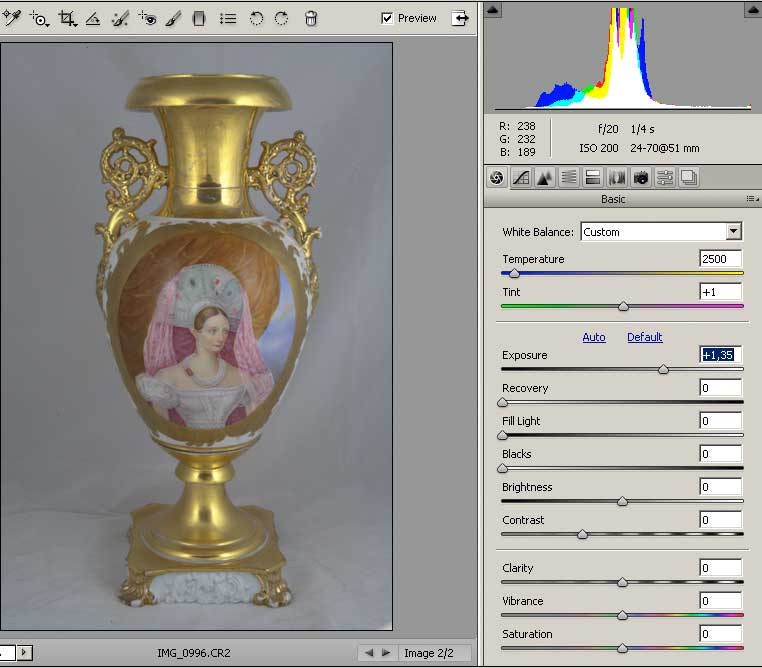
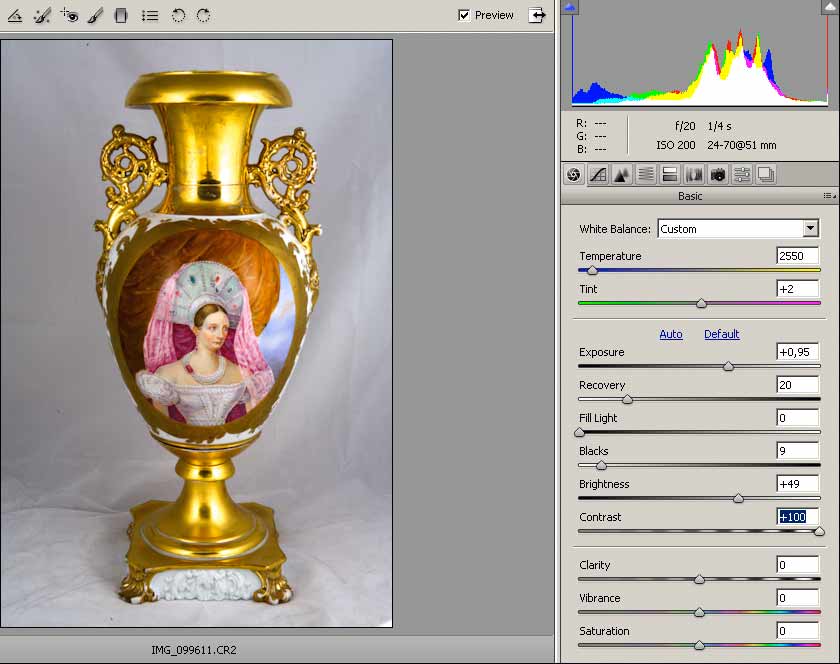
Scale has played its role, moving to a working foto. Set the exposure (Exposure), while on the eye with an eye on the histogram - "have" item in semitones:
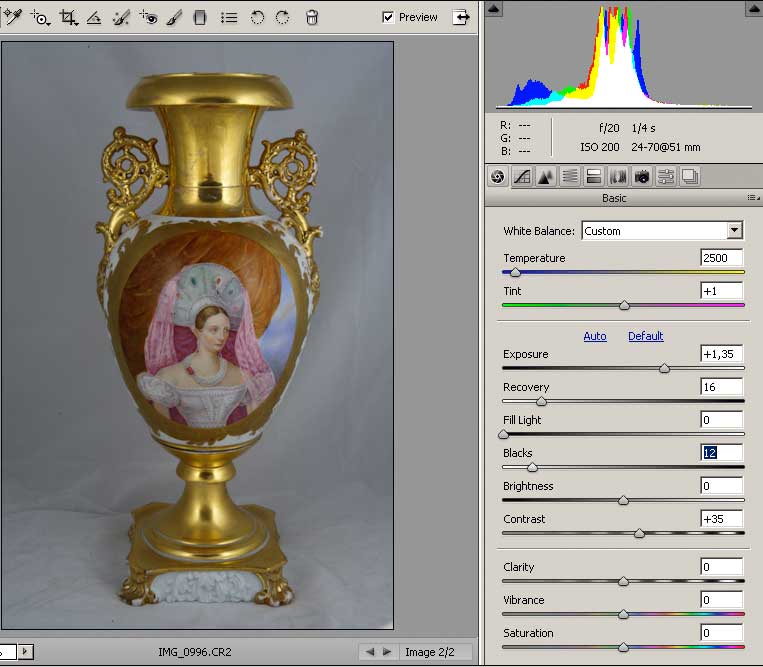
We raise the contrast (Contrast) - for a little bit, focus on the light. As the contrast glare too enlightened to fix this add value to the restoration of lights (Recovery). By increasing the contrast to 25, I was a little increased the importance of Recovery, which will further increase the contrast - which is required again to increase the value of Recovery - main condition here - the object must remain in the midtones, increase the contrast of more than 35 made the unnatural image of enamel, so I stopped at this value brought up the light. And at the end of the histogram falls short of the point of Black , leaving a small "tail" in the left side of the histogram. At this stage, these options have the following meanings:
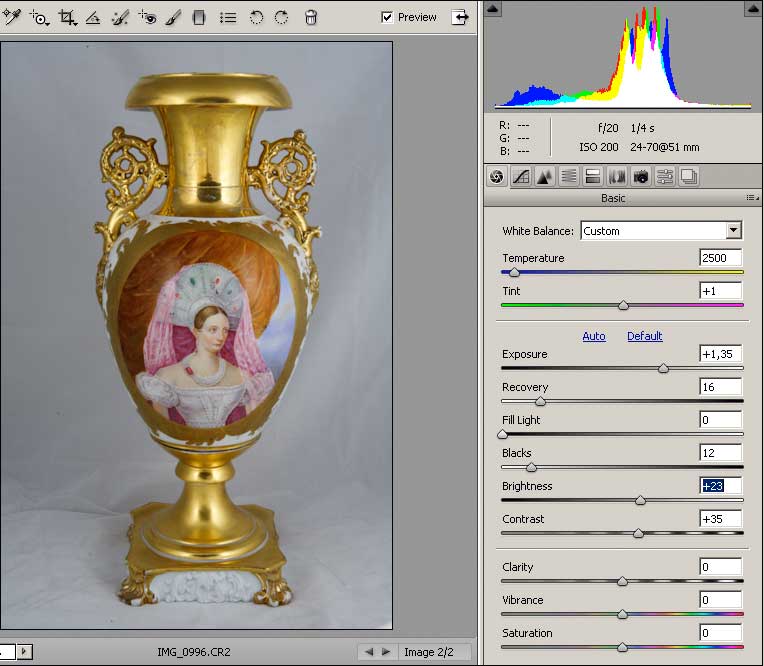
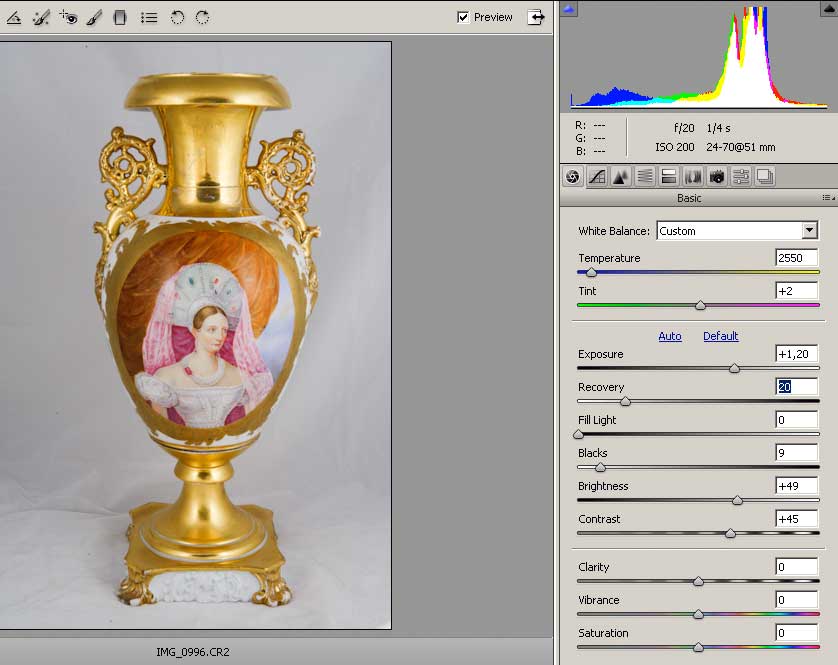
Now you can brighten the image (Brightness):
And again we return to a pair of Contrast - Recovery, which eventually obtained the following values:
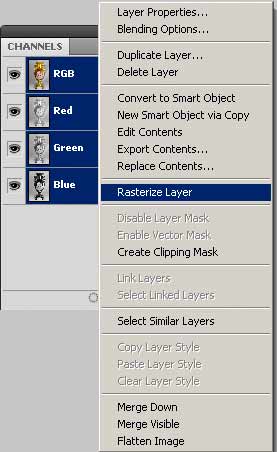
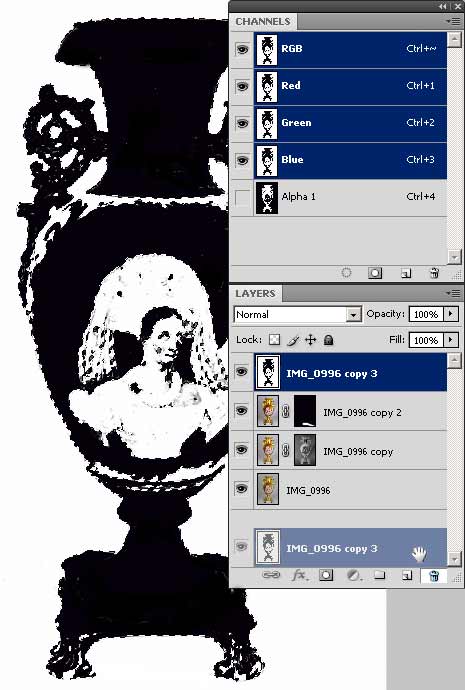
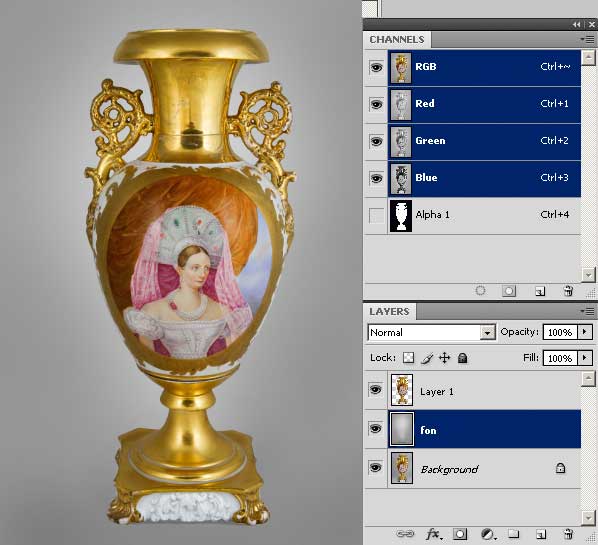
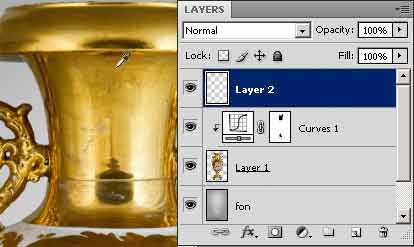
Push the button Open Object. No - the conversion is not complete, but it makes sense to "leave" for work in Photoshop current state. Copy our smart object twice, got three copies of:
Rasterize bottom layer:
Call for processing the second layer, double shelknuv on it (a layer of "transferred for processing in the RAW converter). Here I am preparing a version for further enhancing the contrast - contrast halftones. Another lighten (Brigthness), had little to reduce the exposure and Contrast, which reduced and Recovery:
Crooked increased the contrast of a semitone to the light, what would the total luminosity remains the original and took the first lighten the image.
Click OK. Rasterize second layer:
Load the selection for the composite channel (CTRL + click on the channel RGB) - the selection of "brightness":
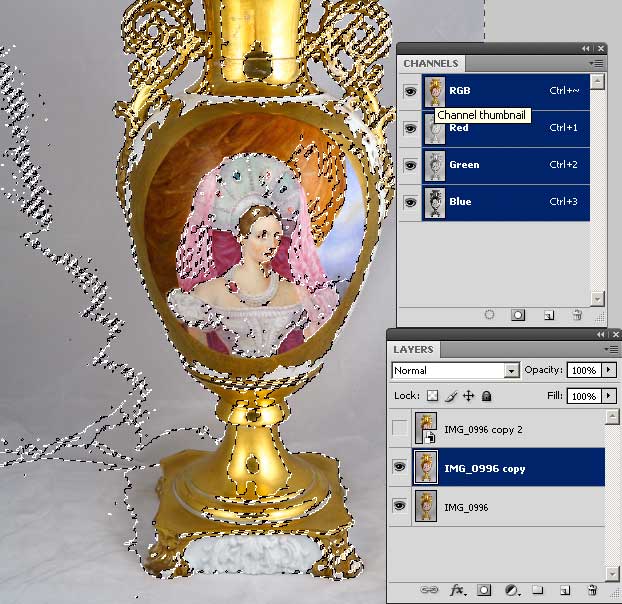
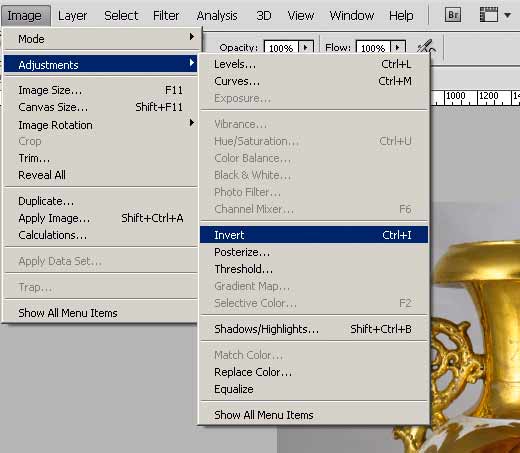
Add a mask to the second layer (the button - the square with a white circle on the lower margin of the layers palette). Invert mask:
Blur:
Duplicate the top layer (the remainder of the smart object) - this is our stock and it still is useful:
Call for processing the third layer, double-clicking on it (the layer again "passed" for processing in the Raw converter)
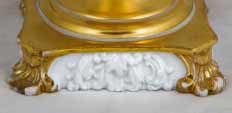
Here we are only interested in the bottom of the vase - to lighten, and at the same time elaborate bas-relief pattern on porcelain pedestal. For this "lifts" the contrast, but after this exposure is abated. Click Ok
Rasterize layer:
Add a mask and invert it:
White brush on the mask to perform a bas-relief pattern in the pedestal vases, "showing" the results of recent work in the RAW converter:
Call for editing the top layer - the last a smart object, double-clicking on it (again working in the converter). The objective - to build a mask of the object. To do this, "dilute" colors that I have and it came with these parameters:
In laying a selective color correction (HSL / Grayscale) put a tick Convert to Grayscale and Blue (Blues) maximum lighten, and all other colors most obscure:
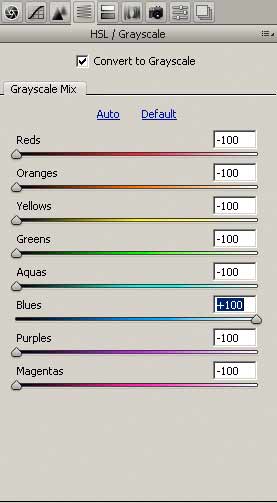
КCrooked doing almost the "threshold":
Recovery and Exposure "mop-up" the background. The result was not bad logging mask:
Click OK and Rasterize layer. Load the selection for the composite channel and save the selection as the Alpha channel. This layer is no longer needed and thrown away.
Porcelain has not got in our mask, finalizing a brush. This is the longest operation in the processing of the image (it took about fifteen minutes, that would slowly, carefully bring the mask to mind)
Copying the vase on a new layer, I painted the background, shadows. I will not dwell on this issue.
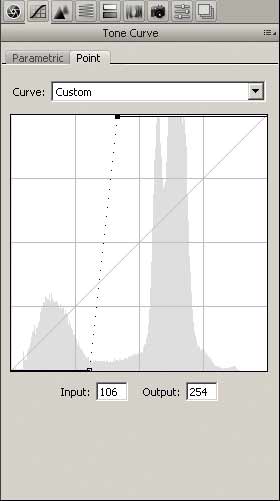
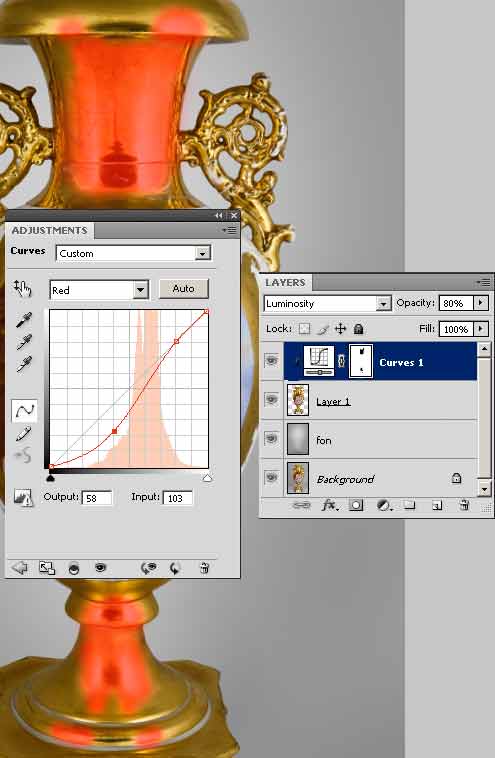
To work more with the contrast in the light of the new background. Create a Curves adjustment layer to Luminosity mode overlap with the Clipping Mask on the lower lying layer.
Choose your hand - "here and there" (in the photo tinted red), the cursor on the image (in a curve running tone circle showing where the cursor is) chose the tone of a third light - snapped, putting a point on the curve, and then clicked on the edge of the vase and left mouse button pulled down - create a curve point - dropped, just picked up the contrast on the Green and Blue channel. A bit overdone and so reduced the transparency of this layer to 80%

Test the impact layer curves (eye layer) has decided that in the glare image becomes worse and this is the place to disguise:
Generally these places is tricky - the glare and reflection of the camera is better removed. Create a new layer. Taking pipette sample colors:
Brush, I paint it problem areas:
Copied layer. For one set the blend mode of Luminosity and opacity 31%, for the other - Color and transparency of 52%
Now is to raise the saturation. Corrective layer Channel Mixer mode superposition Color, in which each component of the enhanced channel main channel up to 150%, and other information channels deducted to -25%:
After this operation, gold has become a "yolk":
Correcting Selective Color layer we remove the yellow of yellow:
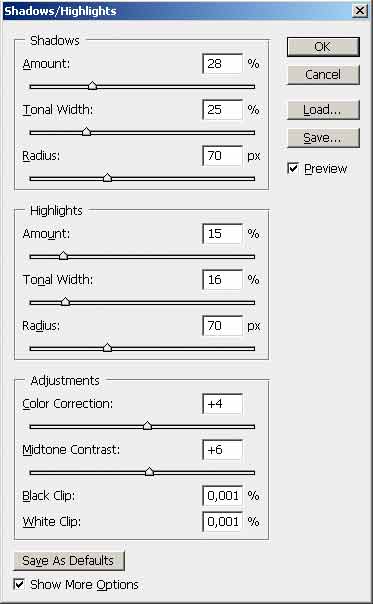
Merge layers and Human shadow-light:
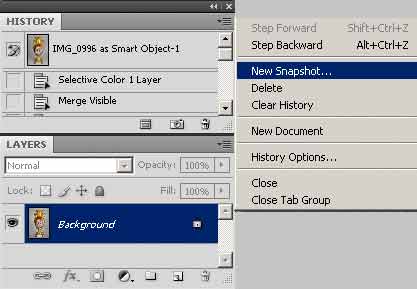
>And raises three hours sharpness. It's time to convert to CMYK. A snapshot of the state:
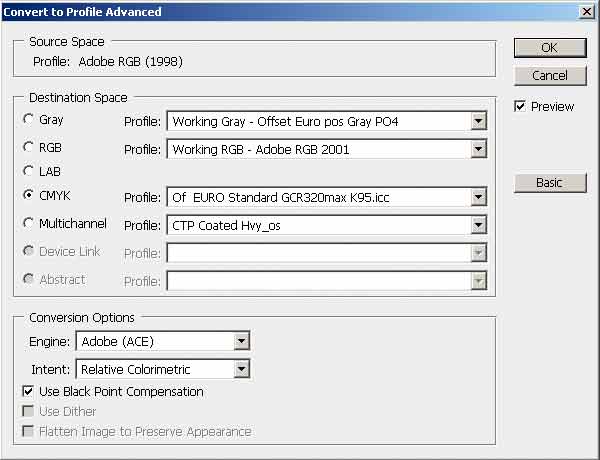
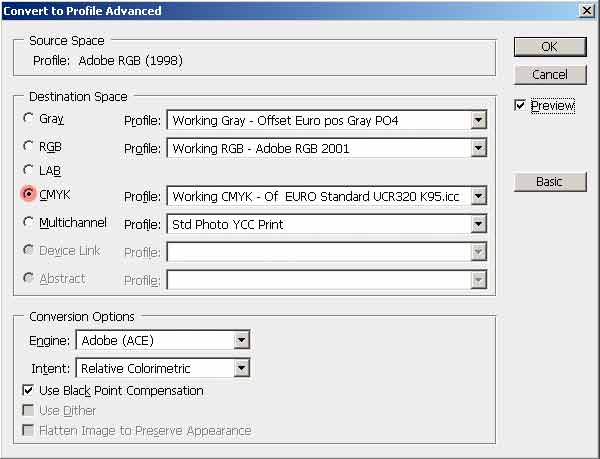
Convert to Profile with the generation of black paint on the GCR maximum.
Reject the profile (after all, in the Color Settings stands Profile UCR)
Create a new snapshot of the state:
We arise to set up a little earlier snapshot:
Image again RGB, convert the image profile UCR:
Load the selection from Alpha channel:
slightly increase its
Feather Selection:

Invert the selection, put the source of history on the snapshot GCR:
create a new blank layer:
Fill it with history (with snapshot GCR):
I turned on the two color separation profile on one the picture - a neutral background with a maximum generation of black paint, thereby avoiding the appearance of a color tint on the background and the vase with a "skeletal" generation of black paint that will get to print the pure colors:
Now you can glue the layers to remove Alpha channel and go from 16 to 8 bits per channel. That's what happened::
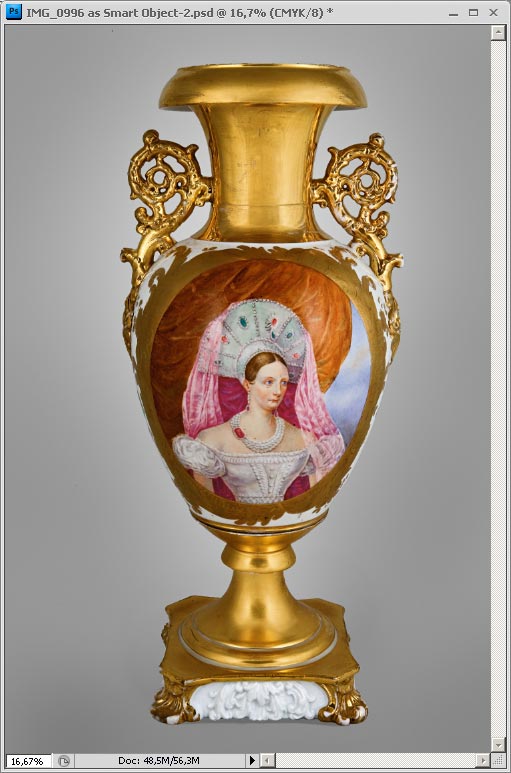
Decorative vase with a portrait of Empress Aleksandry Fedorovny. It is executed in Petersburg at Porcelain factory of Kornilov brothers. The Empress is represented in a suit stylised under Russian national dress. The portrait of empress Aleksandry Fedorovny on a vase is drawn on J. C. Schall lithograph 1838 from F.Kruger's original.
